The Party Cannon - MakerFaire
Navindran S/O Chandran/ Navindran Chandran
Diploma in Mechnical Engineering @Singapore Polytechnic
Works as Fablab Assistant @ Fablab @Singapore Polytechinc
Diploma in Mechnical Engineering @Singapore Polytechnic
Works as Fablab Assistant @ Fablab @Singapore Polytechinc
The Cannon
Material:
1. 80mm diameter Pipes (about 10cm long)

2. 80mm diameter pipes(End Cap)
3. 80mm - 50mm reducer connector

4. 50mm diameter pipe (8cm)

5. 50mm diameter threaded connector. (2 pieces)

6. Ball valve (50mm)

7. 50mm diameter pipe (10cm)

8. Tank Valve (Male) (You can get this from a motorbike shop)

9. Others
•Pipe glue
•Blue cement (PVC glue is good enough)
•Gap sealer
•Confetti
•Balloon
•Candy
•Air pump
Plan:

Detailed plan:

Note:
The tank valve is connected at the 80mm end cap by drilling a hole on it. The tank valve (male) that you buy may vary so drilling the hole may not applicable for this.
Steps:
I followed all the steps from this link
Cannon first edition
Flaws:
The Ball Valve was very hard to turn.
There are some air leakages.

Second edition Canon:
Modification:
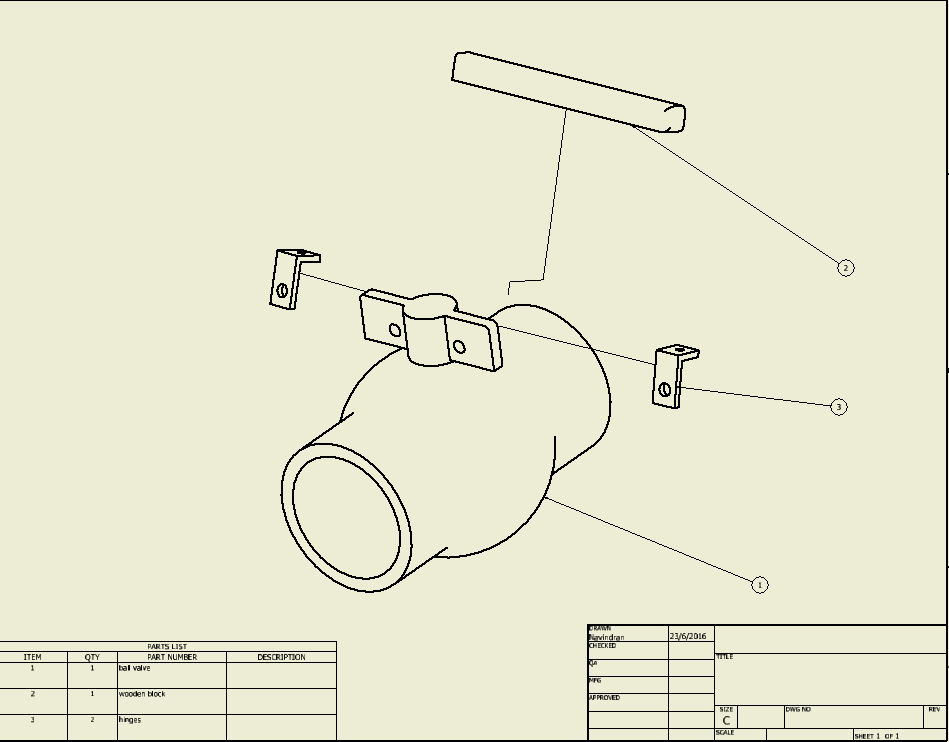
First flaw: The ball valve was very tight and it couldn't be turned.
How do solve the flaws:
We used the fulcrum theory to fix the problem
Material:
1. A wooden piece (I took it from fablab recycle corner)

2. Hinges (Also took it from fablab recycle corner)

Plan:

Second flaw: It's has air leakages.
How I solved the problem.
I used a gap sealer to solve the problem . There were some conventional gap sealer available at a hardware shop.
Cannon edition 2:

Some videos;

Sorry I couldn't be there, I'm in Japan for student's exchange programmes.
Will meet you guys other time with more inventions and makings...
•
No comments:
Post a Comment